Awesome Artists : Fred Blunt

awesome artists

In this series, Awesome Artists, we talk to our favorite artists to find out their techniques, learn how they draw, and get their tips for creating. Last time, we spoke to two artists who gave us a peek at their recent book projects: Richard Jones, illustrator of The Snow Lion, and Colleen Kong, illustrator of The Turtle Ship. Today, we’d like to introduce you to author AND Awesome Artist Fred Blunt.

Meet Awesome Artist Fred Blunt

Fred Blunt is an award-winning illustrator of a bunch of picture books — they all have his signature scribbley style, as you shall soon see (SORRY, I’m a fan of alliteration). Fred is kind enough to share some behind-the-scenes sketches from his latest book, Lionel the Lonely Monster

Lionel the Lonely Lion cover


Kidcandoodle: Hi Fred! Can you please tell us about your new book, Lionel the Lonely Monster

Fred Blunt: Lionel the Lonely Lion is a light-hearted story of friendship, kindness and the power of a hug.

KCD: What inspired the character?

FB: I’ve always loved monsters… right back to watching the muppets when I was little. I always loved the big scary-looking one “Sweetums” (from the Muppets, shown below), and I can still remember my mum reading me Where The Wild Things Are by Maurice Sendak when I was very small. 

sweetums


And Not Now, Bernard by David McKee is perhaps my favorite picture books of all time. So perhaps monsters have always been lurking, waiting to get out into a book for me?

Lionel monster inspiration


The story was actually inspired by a comic I wrote around 2012, called Rupert The Frog: A heart-warming tale of a frog who hates his un-froggy name, comforted by a bug cuddly bear who turns out to be called Kermit. I couldn’t work out how to make that into a picture book text, with the pop culture references, so I decided to write a story that had a similar heart, but more accessible.

Rupert the Frog


KCD: Can you show us more sketches from the story? We sometimes like to see what ideas don’t work, as well as ones that make it into the book.

FB: I think perhaps this is the very first drawing of Lionel in my sketchbook. The monster is sitting, looking sad, with a concerned little dog looking on.

first sketch for Lionel


These are my first scene drawings in my sketchbook… I tend to come up with little scenes, sketched very quickly – just trying to get something onto the page, to see if anything is working or worth exploring.

lionel sketch


lionel sketch


Many of these little scenes made it into the book, although the rowing boat didn’t.

lionel scene


lionel scene


Here’s a scene that was in my first draft manuscript, but sadly didn’t make it into the book.

lionel cut scene


It’s always painful to lose a nice visual gag or a nice line, but with only 32 pages, some good things have to go!

KCD: How did you choose the colors for the book? (I don’t think I’ve ever seen a PINK monster before – does that mean he’s girly?)

FB: The color palette came directly from my first color drawing of the cast of characters: Lionel with Lucy on his shoulders, walking Milo.

Lionel and Lucy, walking Milo


I liked the combination of colors and relished the chance to create a world in this limited palette. I tried a few sample illustrations and (the publisher) Oxford University Press was brave enough to let me tackle the whole book like it.

lionel title page


Lionel doesn’t mind if you consider him girly for being pink… he’s very at ease with his monsterhood! To be honest, I’ve never seen colors as either being for girls or boys… perhaps that’s because I grew up in the ’80s and it was the law for boys to wear pink Lacoste polo shirts, coupled with lemon yellow cardigans!

lionel scene


KCD: I love that your first sketch ended up being very close to the final cover art. It shows that sometimes…

“In drawing, nothing is better than the first attempt” – Pablo Picasso

FB: Picasso is my absolute art hero… the confidence of his work is what makes him so mind-blowing for me! It’s lovely when a cover comes so easily from your first thumbnail… it’s happened twice to me now – this and my book Gnome. I think when it comes to covers for picture books, the simpler and bolder the better; I find that my best work is the work that flows easily and naturally. The challenge is retaining the energy of a thumbnail into the final art.

***

Thanks for sharing your process with us, Fred. Please check out Lionel, the Lonely Monster by Fred Blunt, available here.

lionel hug


***

smileEvery professional illustrator sketches ideas before doing a final piece of art. The first sketches are very loose. Fred says, “I never worry about good drawings at this stage, I just want to get ideas onto the page.”
trythis

Next time when you want to create something, try sketching out a few ideas first. See how many ways you can approach the drawing, trying it in different way each time. Good luck!

***

All images copyright© Fred Blunt and used with permission.
Follow my blog with Bloglovin

Doodle Tips 1

Every experienced artist has some tricks up their sleeve. That’s why we decided to ask some of our favorite artists for their top doodle tips. Here’s what we learned.

Doodle Tips

First up is American author and illustrator Matthew Cordell, whose 2019 book, Wolf in the Snow, won the Caldecott Medal. He also made a book called Hello Neighbor! about one of our favorite people, Mr Rogers. Matthew’s latest book is Bear Island.

Tip #1 – Matthew Cordell


Try to doodle everyday, not with a pencil, but with a pen. It’s fun to see what happens, and it sharpens your hand and eye [coordination] when you can’t erase.

pencil and pen
Drawing without erasing might seem like commitment, but we dare you to try it! Follow Matthew Cordell on instagram to see his drawings and stay for his awesome bird-watching adventures in his stories.

***

Our second doodle tip is from lifestyle illustrator Nadine Mnemoi, whose last name sounds like the sound you make when you kiss. Nadine prefers to doodle digitally, and often cheers us on with her colorful art featuring women.

Tip #2 – Nadine Mnemoi


To be productive and fast, choose the color palette before coloring.

Limiting your color palette to a few shades can also make your work look more sophisticated,  and refined. Which colors would you pick, if you could only use three?

***

Our third expert doodler is Neil Emmanuel, whose experience includes animation and teaching. Neil is currently working on a graphic guide about the Middle Ages. Here’s a preview below.

Neil Emmanuel_middle ages

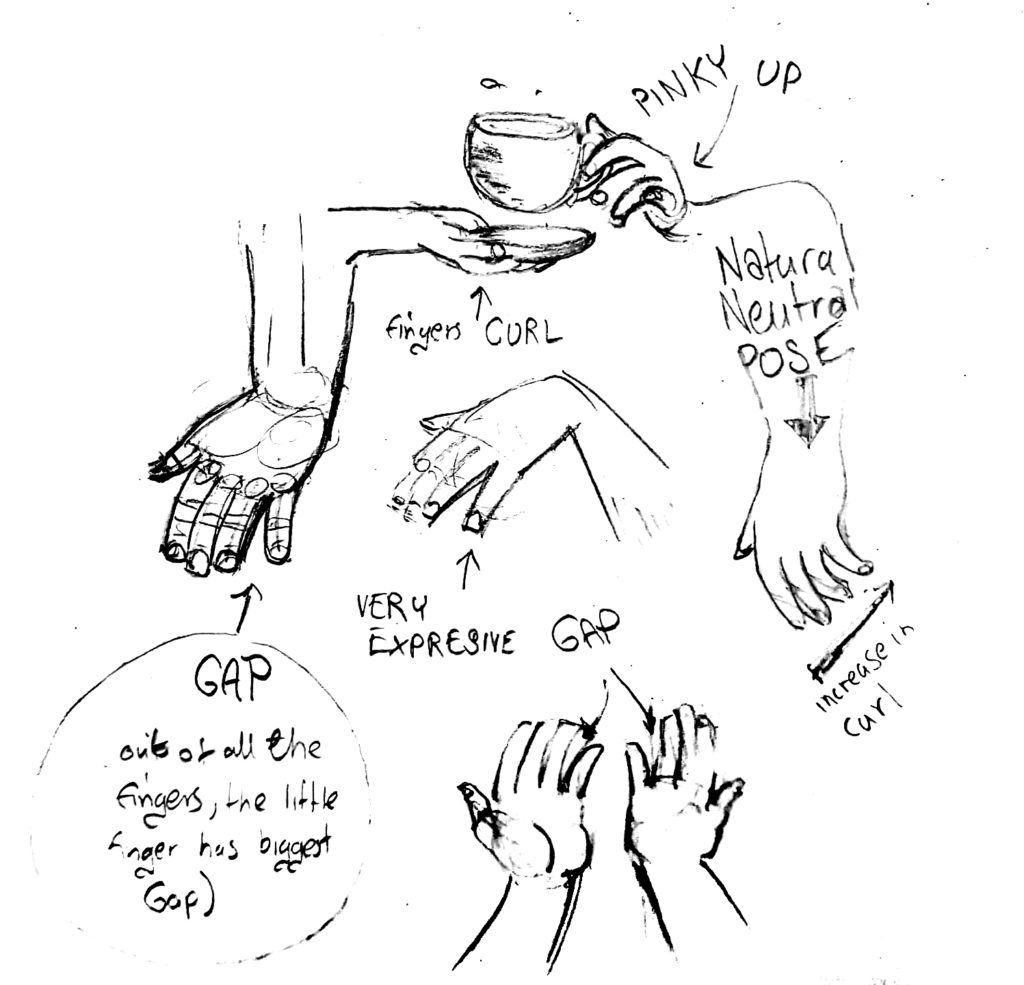
Neil’s advice is technique-oriented, and involves drawing something people often consider tricky : hands.

Tip #3 – Neil Emmanuel


[When drawing hands] you can exaggerate the little finger gap in a pose to add a bit more life… all fingers together, flat, looks like a marching military hand.

See how Neil adds a bit of space between the pinky and ring fingers in his doodle above? You should try it next time you’re drawing hands, and see if it gives your drawings a bit of a lift.

***

Hope these tips help you with your own drawings. Here’s a bonus doodle tip for you.

Do you have a tip for us? Leave it in the comments below. We’d love to add them to a future installment of our Doodle Tips series. Happy doodling!

Follow my blog with Bloglovin

String Scribbling

kcd string scribbling
What is String Scribbling? It’s a doodling technique that is one part string, one part pigment, and one part magic!

We were inspired by this video I saw on Facebook and we had to try it too. Here’s a clip of Little Dude demonstrating the technique:

The complete details for this project is part of our second doodle class, Start with a Scribble, now part of our new doodle club on Ko-fi.com.

Did you see our first doodle class? You can check it out here.

Follow my blog with Bloglovin

How to Draw : Start with a scribble

start with a scribble

Start with a scribble.

How do we learn how to draw? We start with a scribble. By doodling lines and squiggles, we begin to transform the blank page into a drawing.

At kid can doodle, we believe EVERYONE can draw. But each person’s confidence with drawing varies, so we’ve been thinking about how to encourage and support those doodlers who desire more guidance. We knew we didn’t want an outcome-oriented “How to Draw ___” with specific steps for copying each subject. Instead, we wanted to create a doodle approach that could be applied to drawing anything, would build confidence and observational skills, and is a bit silly and imaginative at the same time. It’s a tall order — which might be the reason it took four years to put this together — we hope you like it.

Welcome to kid can doodle class. This is your first doodle lesson. Click on this link to download a worksheet for this lesson, or grab a piece of paper and follow along below. Please NOTE: When downloading from our site, you agree to these terms. Happy doodling!

Start with a scribble.


Doodle Warm-up

Always begin drawing with a quick warm-up exercise. This one is super simple. Start scribbling. Try make your squiggles look like . . .

scribble_squiggle
a snake

scribble_hand

hand(s)
scribble_tree
a tree

scribble_hair

hair
scribble_cloud
cloud(s)
a tornado or cyclone
scribble_dogs
dog(s)
scribble_beard
a beard


This is conscious scribbling. Spend only a second or two on each scribble but think about how you can make them resemble some thing and how you can vary each one. Warming up before you draw helps you loosen up.

Doodle Exercise : Blind Contour

Blind contour drawing is a technique in which you draw the outline of a subject without looking at your page or pencil. Focus only on the object that you are drawing.

For this exercise, doodle your non-drawing hand. So if you’re left-handed, draw your right hand, and vice versa. Remember to look at the object you are drawing, and not your actual drawing. This will take practice as you will want to look at your paper. No peeking! Resist the temptation!

Rotate your hand into another position and draw it again. Repeat.

try thisDoodle TIP : Pretend you are tracing your doodle subject with your pencil; follow the outline of your hand model with your eyes while allowing your drawing hand to follow with the pencil on the paper.

Here’s my show of hands. It’s ok if they overlap, too.

scribble_show-of-hands


If you trust in this method, you will improve your observational skills, which will help you become better at drawing. The purpose of this exercise is not to make a life-like drawing, but to teach yourself to see and focus. It will help you improve your hand-and-eye coordination skills.

Share your doodles with us! Don’t forget to tag them with #kidcandoodle or #startwithascribble

If you liked this lesson, please sign up for our new doodle club on ko-fi. Let us know what you think in the comments below. For more doodle fun, download Doodle Bugs.
 

Follow my blog with Bloglovin

How to Draw a Penguin by Oliver Jeffers

How to Draw a Penguin by Oliver Jeffers

Oliver Jeffers_penguin1

Oliver Jeffers, author and illustrator of many picture books including Lost and Found, Here We Are, A Child of Books, and STUCK (my personal favorite), shows us how to draw a penguin.

Oliver Jeffers_penguin2

It might be tricky to borrow a penguin (for drawing reference), but you might find one at a nearby zoo. Or if you’re lucky enough to visit Phillip Island in Australia, you can see small fairy penguins return to their habitats at the end of the day in the “Penguin Parade.”

Oliver Jeffers_penguin3

You could find the penguin documentary, March of the Penguins, and draw the flightless birds while watching, or by pausing the video.

Oliver Jeffers_penguin4

Penguin doodling begins with simple shapes: circles.

Oliver Jeffers_penguin5

Then connect the circles.

Oliver Jeffers_penguin6

Add oval-shaped wings.

Oliver Jeffers_penguin7

Color in your penguin.

Oliver Jeffers_penguin8

Add details.

Oliver Jeffers_penguin9

If you don’t have white paint, make sure you leave white dots for the eyes by NOT coloring them in.

Oliver Jeffers_penguin10

Shading can be tricky, but remember: shadows are cast away from the light, and that side of the object/subject will be slightly darker than the side nearer to the light.

Oliver Jeffers_penguin11

His feet are doodled much like his beak!

Oliver Jeffers_penguin12

Voilà! You’ve doodled a waiter. Happy doodling!

For more doodling feathered friends, check out How to Draw Birds.

All art copyright Oliver Jeffers, via The Guardian.


Follow my blog with Bloglovin

Awesome Artists : Tim Miller

awesome

In this series, Awesome Artists, we talk to our favorite artists to find out their techniques, learn how they do things, and get their tips for creating. We spoke to Kirsten Ulve to get pointers on sketching people, and Allison Langton, who shared her process on painting plants in watercolor. Today we get a behind-the-scenes look at creating a picture book as we chat to Tim Miller, who brought Snappsy the Alligator (words by Julie Falatko) to life (even though he didn’t ask to be!)

Meet Awesome Artist Tim Miller

Snappsy-Covers

Above (from left to right) are Tim Miller’s sketch, color study, and final cover art with typesetting.

It’s such a treat to see these process images, because we usually only see the final art and it’s so easy to focus on how ‘perfect’ they are. It’s important to know that there are many steps to get to the final art. Nearly all professional artists begin with sketches, the rough ideas that we all make — the ‘doodles.’ I want to demystify the process of making beautiful pictures, but I also want to show how much time and love actually goes into creating these wonderful illustrated books.

KCD: Hi Tim. Thanks for stopping by and sharing your work with us! Can you tell us how do ideas come to you?

TM: The inspiration for my work simply comes from a very mundane knee-jerk response to some sort of external stimulus in the world that strikes a chord with me. (For example, the first time I encountered Julie Falatko’s Snappsy the Alligator, mental images came to mind as I read the story — and those mental pictures became the foundation to build upon.) When I begin to sketch an idea, I try to draw what I’m seeing in my mind as best I can, but it’s not always clear. Usually, it becomes clearer only after I make several rough sketches. I continue to refine the concept until I land on something that feels solid.

I think of the process as trying to make out something in the fog. It’s difficult when you’re far away, but as you draw nearer, the details become more distinguishable. A key part of the process, though, is that I have to be entertained. There has to be a good personal motivation in it to lure me forward.

Tim Miller shows How To Doodle Snappsy in this video:

Snappsy Did Not Ask to Be in This Video About How to Draw Him from Tim Miller on Vimeo.


smileNote that Tim sketches with a brush. There’s a loose, fluid quality to the doodle that the ink and brush gives, with variation in the line width and opacity.

trythisHow many shapes does he use? Try drawing Snappsy as Tim demonstrates with a brush, then create your own character with only one or two shapes, such as ovals/circles or squares/rectangles.

KCD: Can you show us your process for creating the art for the book?

TM: One of my favorite scenes to draw in Julie Falatko‘s Snappsy the Alligator (Did Not Ask to Be in This Book) is when Snappsy throws a party. I drew my first sketch directly on the manuscript to make note of the first idea that came to mind when I read it.

party text

Next, I used that rough thumbnail as a starting point to fill out the scene a little more, giving a better sense of space & atmosphere.

party sketch

Then, I began to tighten up the drawing to see things more clearly making some edits here and there to tweak the overall composition.

Party1

I went back at it again with minor adjustments after sharing my roughs with my Art Director Denise Cronin and Editor Joanna Cardenas. The donkey by the door was reading too much like Snappsy (which I knew they were going to say but I really like drawing him), so they asked me to turn it into a different character which is how the weird dog poodle thing came to be. I was also still working out the final look for Snappsy so you can see him changing here too.

party sketch revise

Then it came time to figure out the colors, so I did a rough color sketch. It took me awhile to figure out what color would be good for the interior of Snappsy’s house. I needed something that complimented his green without overpowering him.  From there, I tried to settle on a festive palette of party hats, balloons, and streamers that popped but also balanced with rest.

Party2

For the finish, first I redrew everything in separate peieces with brush and ink and added watercolor to the drawings. Then, I scanned everything in and pieced it together on the computer adjusting all the colors digitally.

party background

part color with furniture

party color

And finally two minutes before everything needed to go to the printer, things landed here:

Party3

smileSee how important it is to work out details in your drawing in a loose sketch first? There’s quite a few drafts before getting to the final art.

Below watch the book trailer that Snappsy did NOT ask to be in:

“Nope,” says Snappsy.

Snappsy the Alligator (Did Not Ask to Be in This Book) words by Julie Falatko, pictures by Tim Miller, published by Penguin Random House.

***

Tim Miller is an author and illustrator based in New York City. His own Moo Moo in a Tutu, published by Balzer & Bray debuts in early 2017.

trythisCompose your next work of art by planning it out first. Sketch a few different ideas, or perspectives/viewpoints of the subject. Before adding color, consider your palette, play with different combinations, and decide your final medium: colored pencils, watercolors or perhaps acrylic paint. You may not do this with every drawing, but when you’re working on something you want to keep, the early prep will help make the final color work much more enjoyable.

All images courtesy of Tim Miller.


Follow my blog with Bloglovin


Chuck Jones draws Bugs Bunny

Above is Mr Jones drawing one of his most enduringly popular characters. This clip is from the 1991 documentary Chuck Amuck: The Movie.
 
In the video, “Chuck Jones: Extremes and in Betweens – A Life in Animation” (2000), a televised biography that was part of PBS’ “Great Performances” series, Mr Jones credits his parents as the reason he became an artist/animator. He explains that his “mother believed that children could do no wrong, and never criticized [their] drawings.” His father, who moved from job to job, accumulated mass quantities of stationery and pencils from each job and asked his kids to use them up. As a result, Mr Jones drew quite a bit. Later his father enrolled him in the Chouinard Art Institute (now California Institute of the Arts).


Screenshot 2015-03-31 21.15.44

My name is Wile E. Coyote — Genius
Original watercolor on Arches paper, 14″ x 11″, by Chuck Jones circa 1995.


When I was seven, I made my grandma wake me up at 5:30 am every morning so I could watch “The Bugs Bunny & Road Runner Show.” It was my favorite show. With Easter in mind, we’re honoring our favorite “wascally wabbit.” We selected a few favorite stills and sketches from Bugs’ creator/director’s official Tumblr of Chuck Jones.

Bugs was so shrewd, always outsmarting Elmer Fudd.

Screenshot 2015-03-31 21.13.37

“A Wild Hare” directed by Tex Avery and released in theaters on July 27, 1940.
Image courtesy GoldenAgeCartoons.com


We agree: he’s super!

Screenshot 2015-03-31 21.12.23

“Super Rabbit,” directed by Chuck Jones and released in 1943. Top, original lobby cards;
center, original layout drawing by Chuck Jones, graphite on 12 field animation paper.


Screenshot 2015-03-31 21.10.58

Design for a cut-out sign of Bugs Bunny for the front gate of Warner Bros. Studios by Chuck Jones, circa late-1940s. Graphite and colored pencil on 12 field animation paper.


via The Kids Should See This and Kotte


Follow my blog with Bloglovin


Doodle Tips : Draw at an Angle

Doodle Tips

Want a simple way to improve your drawings? Try this doodle tip:
face-8

Next time you’re drawing, instead of having your paper or pad flat on the table or floor, try placing your sketchbook (or paper on a clipboard) at a 45-degree angle, or more vertical than horizontal. You’ve probably noticed artists drawing at an easel, right?

When you have your paper at an angle, it will make it easier to translate what you see onto the paper, with less distortion. So, try propping your pad upright, against a table, your knees, or using an easel, as shown above and below.

face-6

I dare say you’ll see a huge improvement in the accuracy of your drawings! Check out more doodle tips here. Happy doodling!

Follow my blog with Bloglovin

Your Drawing Kit

In theory, you just need pencil and paper to draw, and if you only have copier paper and a No. 2 (HB) pencil, they will suffice, but there are better options available.

Below are some suggestions to expand your drawing kit. I encourage you to try as many as you can to see which ones you feel most comfortable using. Each will give you different results as well, so have a play with that too.

KCDpencil

Pencils

Two types of drawing pencils are described here; it’s ideal to have a combination of them.

lead_grade_swatches-11

1. Graphite pencils vary from hard (H) to soft (B=blackness of the mark) leads. The above chart from Pencils.com illustrates the varying results from the hardness of the graphite. Most sets include a range from 2H–5B, which is perfect. (I tend to use HB–2B for most sketching and drawing). Using harder leads will result in lighter lines which makes them best for initial sketching, but they’re probably too light for a finished drawing. They are also good for more architectural or technical drawings that are highly detailed and when you don’t want them to smudge. Pressing firmly with a 4H pencil will form impressions in the paper rather than a darker line, so use softer pencils for richer drawings and for shading/smudging. Since they’re more difficult to erase, you may want to use them after you’ve done your rough sketch.

Tip: Especially for harder leads, sharpen as often as necessary.

2. Charcoal pencils are very soft, and will give you rich, dark lines that are great for smearing. Willow charcoal are super-soft branch-like sticks that are terrific for gesture drawing. They are so soft that they break and crumble easily, so handle with care. You can also find compressed charcoal sticks, and Conté crayons (compressed charcoal mixed with a clay or wax), which work well on toothier (less smooth) paper, such as newsprint or pastel paper. Use the narrow end to draw, and the wider side of the sticks for quick shading.

Note that charcoal leaves a dark, matte, velvety surface, while graphite pencil produces a shinier, greyer, smoother surface, so the two don’t mix well.

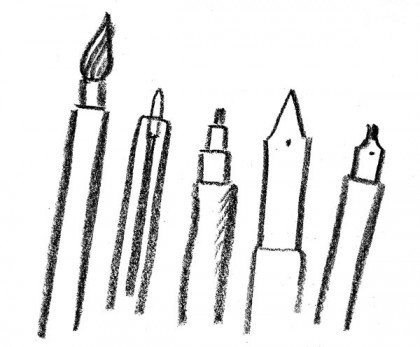
kcdpens

Pen & Ink

Pens produce clean lines, but they are often not erasable, so you have commit to the lines you create, and may take longer (more confidence) to master. You’ll also need to employ different shading techniques because they don’t blend as easily. They’re preferred for technical and architectural drawings too.

1. Ballpoint pens are cheap and very common, and work well on napkins.

2. Fineliner/fiber-tip and markers are better quality and come in several sizes (eg. fine, medium, broad), giving you thin or thicker lines. These are ideal for stippling (shading with repeated small dots) or cross-hatching (shading by drawing a series or parallel or crossing lines).

3. Ink can be used with brushes, bamboo, straws, sticks, and other drawing tools, giving you a variety of results, so definitely experiment with them. More care is necessary with ink as you can spill it, or stain yourself or clothing.

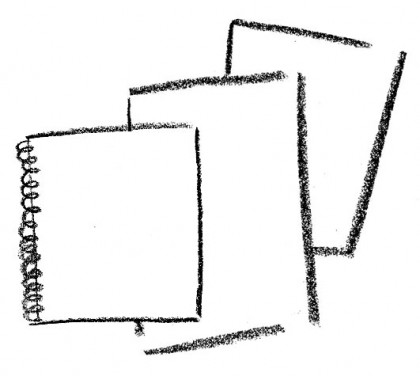
KCDpaper2

Paper

Drawing paper comes in varying weights and quality, and it’s nice to have a variety in your kit.

1. For quick, loose gesture drawing and sketching, I use newsprint, which comes in different-sized pads. It’s cheaper, and not archival quality, and comes in a smooth or rough texture. Either is fine, but the pencil glides more easily on the smoother grade.

2. Sketchbooks are usually medium weight and quality, are fairly inexpensive, and are great for everyday drawing.

3. If you want to use ink, watercolor, Conté crayons or pastels, consider buying the better quality paper that is usually textured and made for that purpose. They may be pricier, but they’re archival, and you’ll likely create something that is worth saving.

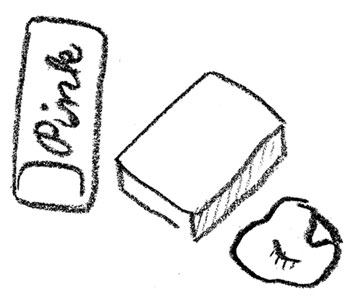
KCDeraserssm

Erasers

When you’re ready to upgrade from the one conveniently located at the end of your No. 2 pencil, here’s a few to try:

1. Kneaded or putty erasers—malleable as their name implies—are great because you can shape them to a fine point if necessary to rub out a detail, or fold them into themselves in order to find a “clean” side. You can even use them to blend, soften lines, and shading. I highly recommend having one (or more) of these in your kit.

2. Iconic “Pink Pearl” erasers, commonly found in stationery stores and schools, have been around for decades. They are usually found on the tip of yellow pencils, and will leave residue.

3. White vinyl erasers (eg. Staedtler Mars plastic) can be used to erase technical pens, but are now commonly found everywhere. I find that they often smudge the graphite a bit before erasing clean, but leave less residue.

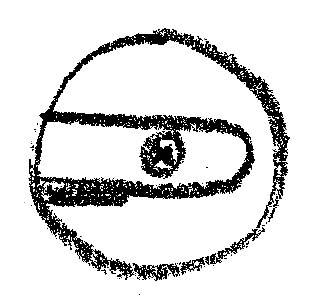
kcdsharpener

Sharpener

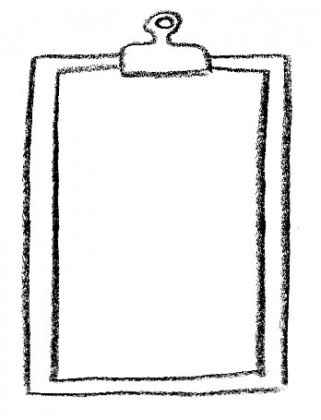
kcdclipboard

Clipboard

Consider purchasing a clipboard or easel. They’re portable desks and help position your drawing paper at an angle—more preferable to a flat desk position.

kcdchinamarker

A note about my favorite drawing implement: a Sharpie China Marker. Not really a marker, but a grease pencil. They are typically used to write on film, or marking negatives, and feel very similar to drawing with a wax crayon. I started using one when I created spot illustrations for a book I was designing, and now use them for all the drawings you see on Kid Can Doodle. They are self-sharpening, soft, and rich in color. I like the roughness of the line, which is more forgiving than a marker. You can see more of my China Marker doodles here.


Follow my blog with Bloglovin

5 Ways to Draw a Selfie

When trying to create your portrait, think of what makes you distinctive, or what makes you look different from anyone else. What’s your hair-color and hairstyle? If you always wear your hair in pigtails, then you’d definitely want to show your hair up, instead of down. What color are your eyes? Do you wear glasses? Is there a favorite hat or dress that you always wear? Maybe you’re known for wearing a bow in your hair, or red boots. If someone saw you down the street, how would they know it was you? If you were a character in a book or tv show—who wears the same thing all the time—what would you wear? Also, consider adding details such as your home, or pet or beloved things (sports equipment, toys, etc.) that are special to you and help tell the viewer about you.

Just in case you need some inspiration, here are 5 ideas for creating your self-portrait:

1. Make a Mirror-Image. Sit in front of a mirror, as Norman Rockwell did, and render your reflection.

2. Dupe the Other Half. Print out or photocopy a snapshot of yourself, fold in half, place onto another piece of paper, and draw the other half. Like Jimmy the cat did here:

kcdportrait_sm

3. Pretend to be Picasso’s Muse. Take a look at a few of Picasso’s portraits below: {from left to right: Portrait of Dora Maar, 1937; Girl Before a Mirror, 1932; Seated Woman (Marie-Thérèse Walter), 1937}, and try your hand at Cubism, a style of art that the artist made famous.

kcdpicassoportraits

Take note of the way he seems to combine both frontal and side views of a face. Here’s Jimmy’s interpretation:kcdportrait_cat_sm

4. Make a Minecraft Mosaic. Take some grid paper, and sketch your hair, eyes, and mouth, using only the squares as a guide. Then fill in with color. This is a good exercise in reducing details to simple shapes.

kcdportrait_minecra


Variation: If you want to try a more detailed version, take a look at this Self-Portrait by Chuck Close:

large

Image Credit: © Chuck Close, Courtesy Pace Gallery


5. Cartoonize Yourself. You don’t need a Simpsons Avatar Generator to create your own cartoon character. Take note of their distinctive details as you’re drawing:

The round eyes. Add eyelashes if you’re a girl. Note: If you wear glasses, draw the glasses and then add the dots for iris, so the glasses are combined with the eyeballs.

kcdsimpsonseyesOther features such as the nose, mouth (with an exaggeratedly pronounced upper lip), and ears look like this:

kcdsimpsonsnoseAnd don’t forget to add that trademark bright yellow.

kcdsimpsons2

Variation: Inspired by this Buzzfeed post, I created a Power Puff Girls version of myself:

kcdportrait_ppg_smDon’t forget to check out these 10 Famous Faces for more inspiration and How to Draw Your Face for rendering tips. Then enter your self-portrait in our Selfies show.


Follow my blog with Bloglovin